It is a rare sighting to see a fully grown avocado tree if you are not living in Central America or Mexico (California and Florida in the USA). Many people have tried to grow one in their own environment and have failed. However this is a reason to try harder, not to give up.
Avocado tree can grow up 70 feet in height, with leaves which are about 5 to 10 inches long. Avocado tree has small greenish-yellow flowers. The pear-shaped fruit is about 4 to 9 inches long, weighting between 4 oz to 34 oz, and has 1 single seed in the center.
However, you shouldn’t worry about the height. Your avocado won’t grow that tall!
How to grow avocado from seed or pit
STEP 1 – REMOVE & CLEAN PIT
You’ll need to start by removing the pit from the avocado carefully (without cutting it), and then washing it clean of all the avocado fruit (often it helps to soak the pit in some water for a few minutes and then scrub all the remaining fruit off). Be careful not to remove the brown skin on the pit – that is the seed cover.
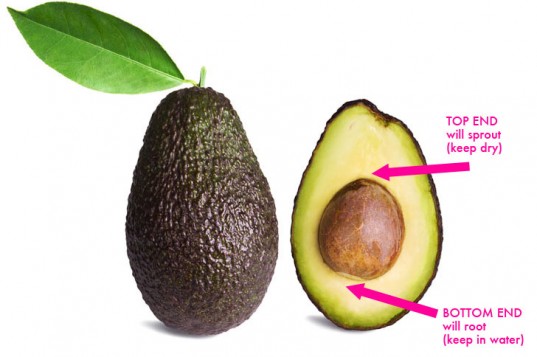
STEP 2 – LOCATE WHICH END IS ‘UP’ AND WHICH IS ‘DOWN’
Some avocado pits are slightly oblong, whereas others are shaped almost like perfect spheres – but all avocado pits have a ‘bottom’ (from where the roots will grow), and a ‘top’ (from which the sprout will grow). The slightly pointier end is the top, and the flat end is the bottom. In order to get your pit to sprout, you will need to place the bottom root end in water, so it’s very important to figure out which end is the ‘top’ and which is the ‘bottom’ before you go piercing it with toothpicks.
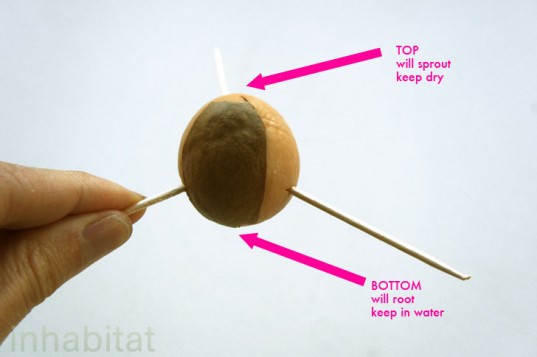
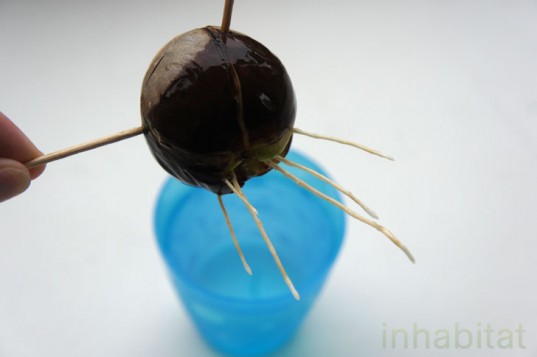
STEP 3 – PIERCE WITH FOUR TOOTHPICKS
Take 4 toothpicks and stick them at a slight downward angle into the avocado seed, spaced evenly around the circumference of the avocado. These toothpicks are your avocado scaffolding, which will allow you to rest the bottom half of the avocado in water, so therefore the toothpicks need to be wedged in there firmly. I recommend sticking them in at a slight angle (pointing down), so that more of your avocado base rests in the water when you set this over a glass.
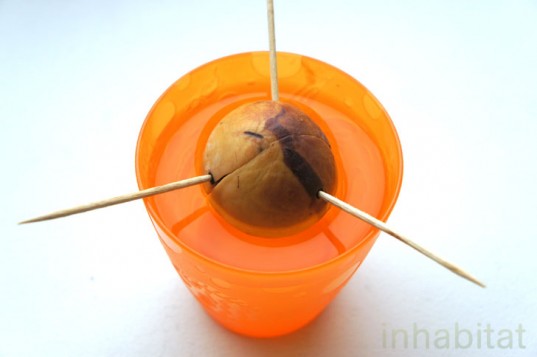
STEP 4 – PLACE AVOCADO SEED HALF SUBMERGED IN A GLASS OF WATER
And set on a quiet windowsill with sunlight. It’s helpful to use a clear glass so you can easily see when roots start to grow, and also when the water needs to be changed. Many guides recommend to change the water every day, but I found, through trial and error, that it is better to change the water every five days to a week or so. You do want to make sure you change the water regularly, to prevent mold, bacteria and fungus growth, which can doom your little avocado sprout.
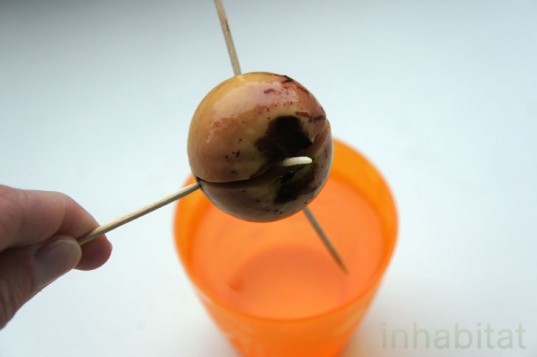
STEP 5 – WAIT FOR YOUR AVOCADO SEED TO SPROUT!
Many online guides I have read say that sprouting can take anywhere from 2-4 weeks, but in my experience, it usually takes at least 8 weeks to get a sprout, so be patient. Here is the process you will witness:
1. The top of the avocado pit will dry out and form a crack, and the outer brown seed skin will slough off.
2. The crack will extend all the way to the bottom of the avocado pit, and through the crack at the bottom, a tiny taproot will begin to emerge.
3. The taproot will grow longer and longer (and may branch), and eventually a small sprout will peek through the top of the avocado pit.
4. Do not allow your taproot to dry out unsubmerged EVER – doing so will be the death of your plant.
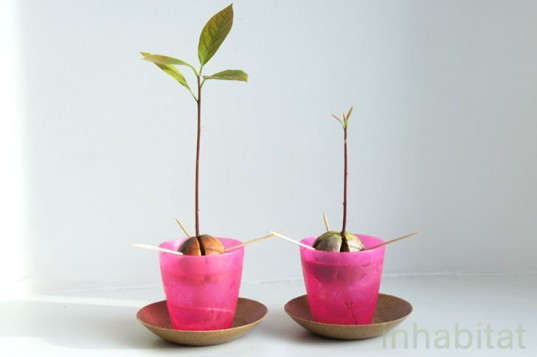
STEP 6 – POT IN SOIL WHEN TREE IS ABOUT 6” TALL
When the stem is 6-7 inches long, cut it back to about 3 inches, this will encourage new growth. When it hits 6-7 inches again, pot it up in a rich humus soil in an 8-10″ diameter pot, leaving the top half of the seed exposed. Place on a sunny windowsill. Avocados love sun – the more sun the better.
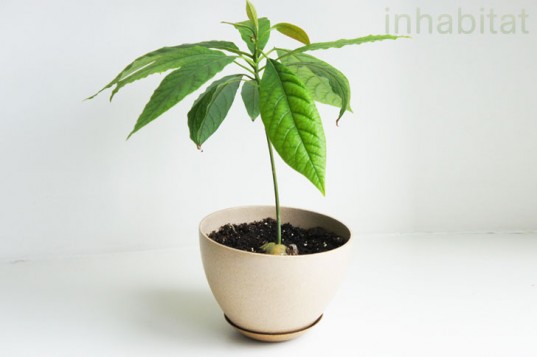
STEP 7 – WATER & WATCH IT GROW
Give it frequent waterings with an occasional deep soak. The soil should always be moist, but not saturated. Yellowing leaves are a sign of over-watering; let the plant dry out for a few days.
STEP 8 – PINCH OUT TOP LEAVES TO ENCOURAGE BUSHINESS
When the stem reaches 12 inches tall, pinch out the top two sets of leaves. This will encourage the plant to grow side shoots and more leaves, making it bushy. Each time the plant grows another 6 inches pinch out the 2 newest sets of leaves on top.
STEP 9 – TROUBLESHOOTING BUGS
My avocado trees seem to collect aphids – the nasty critters can’t get enough of the delicious avocado leaves. If you get them, here’s how to get rid of them: Wash all of the aphids off the plant by spraying your plant down with a hose outside or in the sink/shower. Once the little pests are off, spray your plant with a mixture of water with a small squirt of dishwashing liquid and a teaspoon of neem oil. This will keep aphids from returning. Check your plant every 4-5 days and re-clean and spray when necessary.
STEP 10 – WINTERING
Baby avocado trees can kick it outdoors in summer, but if you live anywhere where it gets cooler than 45 degrees F, you’ll need to bring them back indoors in the fall/winter, before the temperatures fall.
Inspired by a post in Inhabitat